Week 15, day 3: Plaster, plaster and more plaster
13th August 2014
This is the 100th day of the build - a momentous milestone that probably went un-noticed by everyone else involved. The plasterers continued to plaster, and the builders continued to build.
Moving on from the en suite nooks yesterday, the builders built the units for the main bathroom today.
Photo 1: The nooks for the shower in the main bathroom are very similar in dimensions to the nooks in the en suite shower, but they are half as deep. We didn't think they needed to be as deep, and the extra 150mm would be better used in the shower than having space for 6 shampoo bottles on each shelf. So after building the one for the en suite yesterday, the one for the main bathroom went up a breeze today.
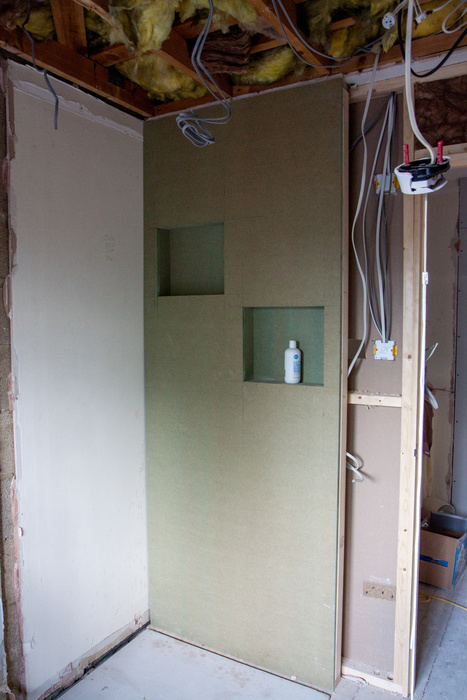
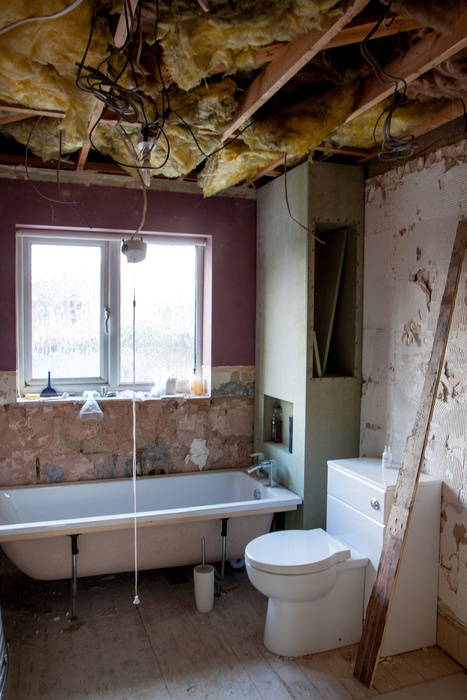
Photo 2: Somewhat more complicated was the cupboard for the end of the bath. I didn't want the space to go to waste, and as it wasn't a huge space, a built in cupboard was really the only thing possible. We wanted a nook for the bubble bath above and behind the taps, not so tricky, and we wanted a cupboard above that to keep things in (towels maybe). There were a lot of questions about this cupboard - how big? how tall? which side will the door be - bath side or toilet side? how many shelves inside? I actually didn't mind, and after my one suggestion of having a door that opened and exposed both the front and the side, was point blank turned down saying this was not an option, I left the rest with the builder to make a cupboard as big as possible in the space available, but asked that the door wasn't made too high, or I won't be able to reach the top shelf. In addition, I wanted a cupboard at the bottom to store bleach etc in. Again, I didn't mind the dimensions, and couldn't really picture how big it could be. I left it to the builder to do his best, and I trusted that he would. It turns out, the cupboard at the bottom was going to be so small it was not worth building, considering the toilet waste pipe would take up well over half the width of it. So I came home to find this lovely looking unit, with a nook for the bath and a cupboard for the towels. We may not be able to fit all the towels in, but it is much better than nothing and a wasted space. For us, it is also better than having shelving without a door for "show towels" - we don't do "show towels".
Photos 3 and 4: The plasterers continued today, working on bedroom 1. They first had to prep the walls (I still have to establish what that actually means), before the plaster started to go up.The join between the old ceiling and the new ceiling has been plastered with a bonding agent to try to make it level. The new ceiling is marginally lower than the old ceiling, and so it is the plasterers job to "make it good".
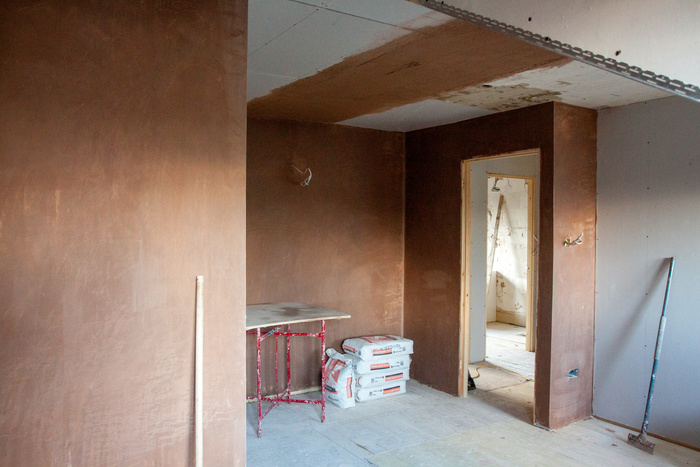
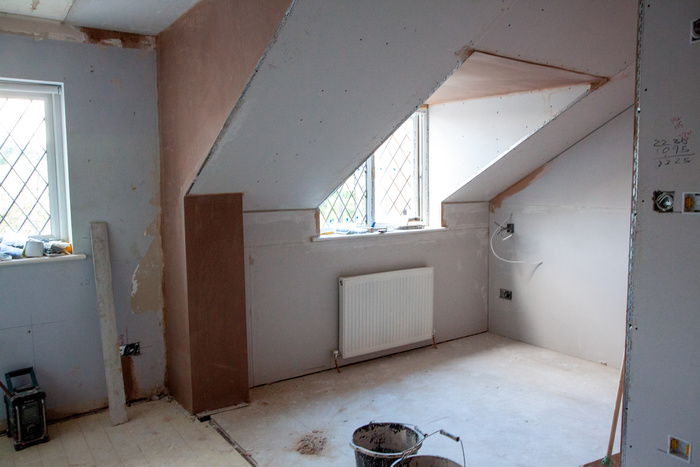
Photo 5: Downstairs, the plasterers have boarded up the old chimney channel in the wall, ready to be "made good" later in the week.
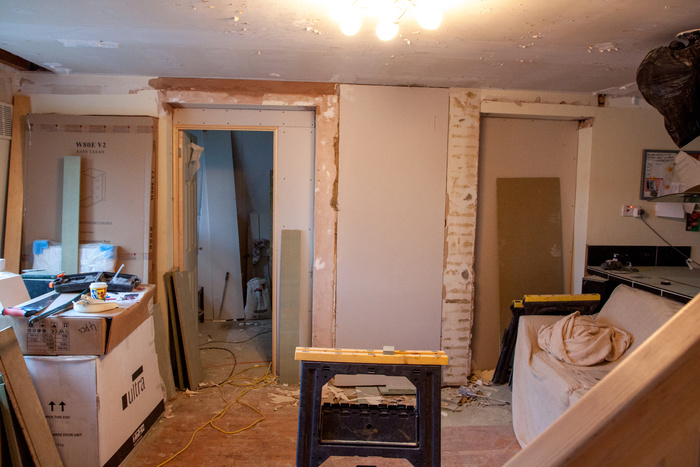
Photo 6: In the library, the blocked up door way has been plastered.
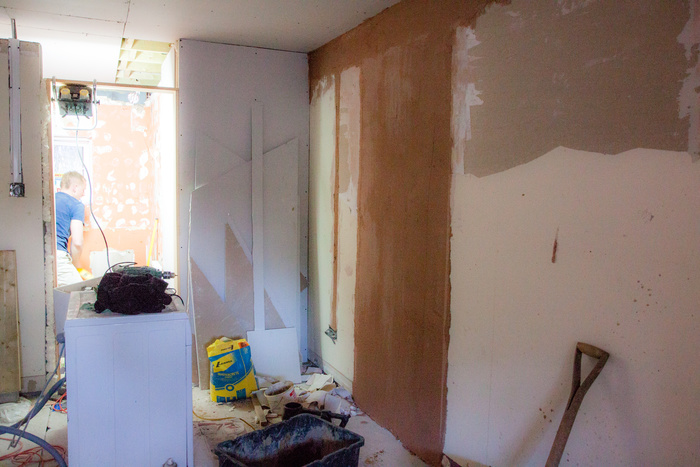
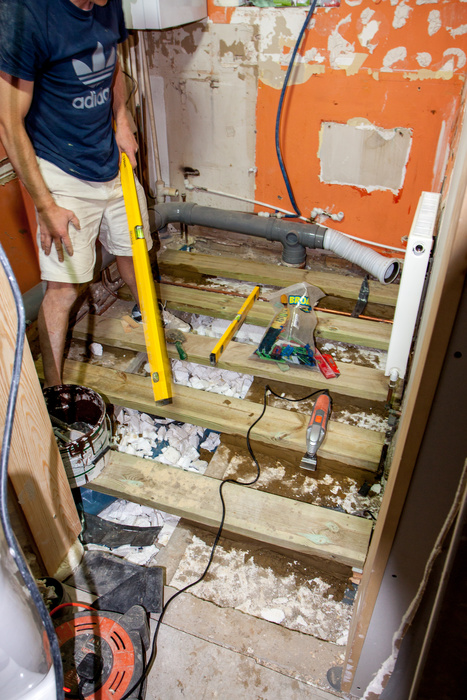
Photo 7: The utility room floor has progressed nicely, with the joists being cut to size and cemented in place. They are currently level...
Moving on from the en suite nooks yesterday, the builders built the units for the main bathroom today.
Photo 1: The nooks for the shower in the main bathroom are very similar in dimensions to the nooks in the en suite shower, but they are half as deep. We didn't think they needed to be as deep, and the extra 150mm would be better used in the shower than having space for 6 shampoo bottles on each shelf. So after building the one for the en suite yesterday, the one for the main bathroom went up a breeze today.
Photo 2: Somewhat more complicated was the cupboard for the end of the bath. I didn't want the space to go to waste, and as it wasn't a huge space, a built in cupboard was really the only thing possible. We wanted a nook for the bubble bath above and behind the taps, not so tricky, and we wanted a cupboard above that to keep things in (towels maybe). There were a lot of questions about this cupboard - how big? how tall? which side will the door be - bath side or toilet side? how many shelves inside? I actually didn't mind, and after my one suggestion of having a door that opened and exposed both the front and the side, was point blank turned down saying this was not an option, I left the rest with the builder to make a cupboard as big as possible in the space available, but asked that the door wasn't made too high, or I won't be able to reach the top shelf. In addition, I wanted a cupboard at the bottom to store bleach etc in. Again, I didn't mind the dimensions, and couldn't really picture how big it could be. I left it to the builder to do his best, and I trusted that he would. It turns out, the cupboard at the bottom was going to be so small it was not worth building, considering the toilet waste pipe would take up well over half the width of it. So I came home to find this lovely looking unit, with a nook for the bath and a cupboard for the towels. We may not be able to fit all the towels in, but it is much better than nothing and a wasted space. For us, it is also better than having shelving without a door for "show towels" - we don't do "show towels".
Photos 3 and 4: The plasterers continued today, working on bedroom 1. They first had to prep the walls (I still have to establish what that actually means), before the plaster started to go up.The join between the old ceiling and the new ceiling has been plastered with a bonding agent to try to make it level. The new ceiling is marginally lower than the old ceiling, and so it is the plasterers job to "make it good".
Photo 5: Downstairs, the plasterers have boarded up the old chimney channel in the wall, ready to be "made good" later in the week.
Photo 6: In the library, the blocked up door way has been plastered.
Photo 7: The utility room floor has progressed nicely, with the joists being cut to size and cemented in place. They are currently level...