Week 16, day 2: The fascia goes up.
19th August 2014
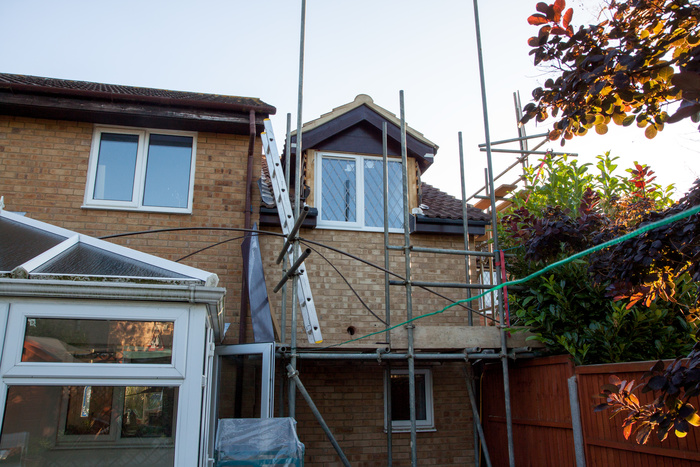
The builders were back up on the roof today, fitting the fascia, soffits and guttering to the new bit, and around the new windows. The "plastic that looks remarkably like wood" material that they used looks really great, and the dormer windows are finally finished off and look very smart.
Photo 1: The fascia and soffits around the back dormer window.
Meanwhile back inside,the plasterers prepped the walls in the utility room - I was beginning to think we were never going to see the end of the orange walls! The also finished boxing in the waste pipes in the library and above the breakfast bar, and the underside of the stairs.
Photo 2: The orange wallpaper in the utility room is removed and the walls prepared for plastering.
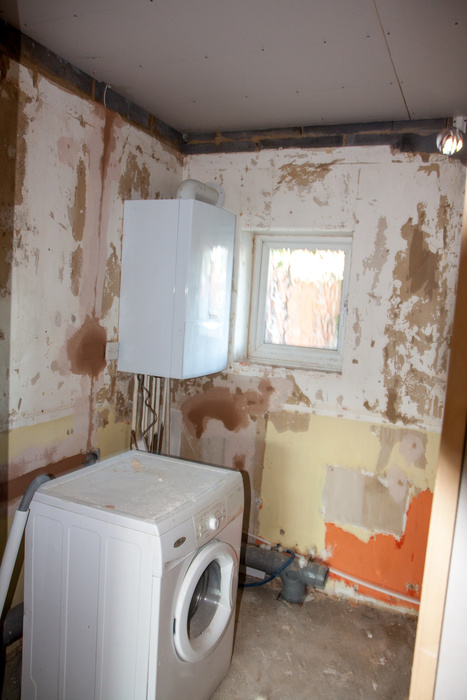
Photo 3: The waste pipe from the en suite is boxed in in the study - you'll hardly notice it there when the plaster and paint is on.
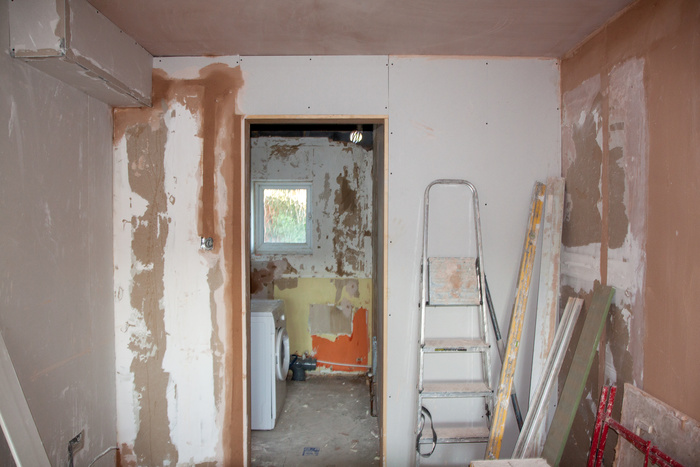
Photo 4: The waste pipe from the shower in the main bathroom is boxed in now above the breakfast bar. This may mean that we will need to find a new location for the big picture that used to hang here, but we have a lot more wall space now, so that shouldn't be a big issue! More importantly, the hole in the ceiling finally has now been boarded up, ready for plastering.
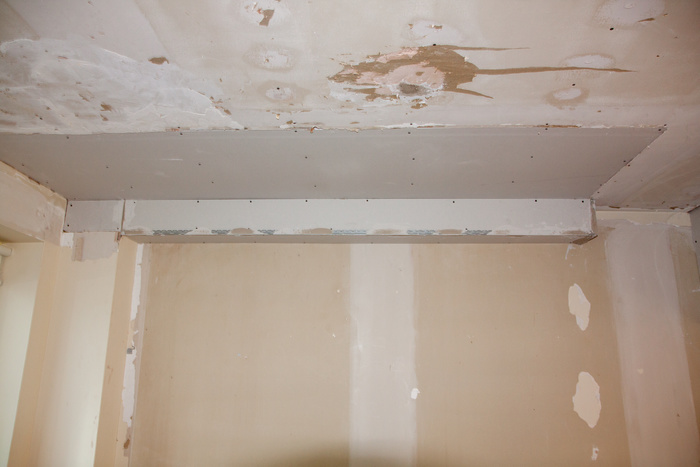
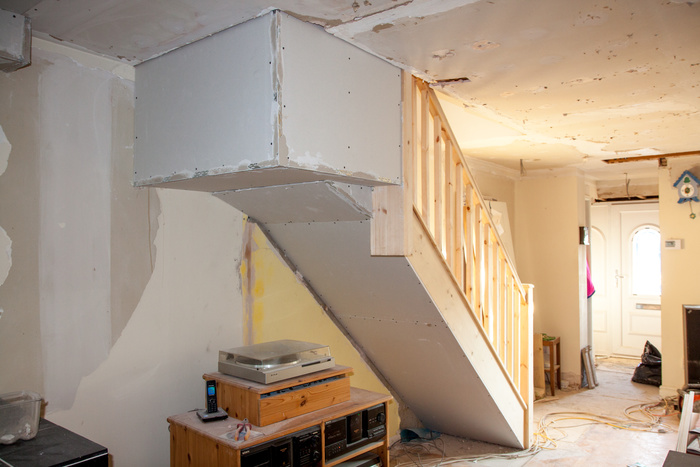
Photo 5: The new stair case is boxed in with plasterboard. Note the small sloped bit between the horizontal and the underside of the risers - this took a few men a good while to decide whether it should come out to level with the horizontal, or be where it is here. Good decision, whoever made it!
This evening, after our exertions last night of removing the adhesive from the bathroom wall, we learned how to dot and dab plasterboard (moisture-resistant, green plasterboard, bought home on the roof of the car). Firstly we had to cut the plasterboard to size - not easy to get bang on, whilst not being able to move the toilet cistern more than an inch away from the wall. The builder had plumbed it in in such a way that the housing unit was trapped and whatever we do in the bathroom is going to have to be around it! Once measured, cut and happy, we moved to dotting and dabbing. We still aren't sure which action is dotting and which is dabbing. Apparently I became quite proficient with the plasterers mixer - not dissimilar to whisking a meringue; we whisked until the plaster made nice soft peaks! We realised that the plasterers make throwing plaster on the wall look rather more easier than it is, as to start with there were more dots (or dabs) on the floor than on the wall. But eventually we got the hang of it and the plasterboard was raised in place, made vertical with the aid of a level, and held until it was holding itself. Despite the second late finish in a row, we were really pleased with our achievement. This will be a whole lot easier to tile onto!
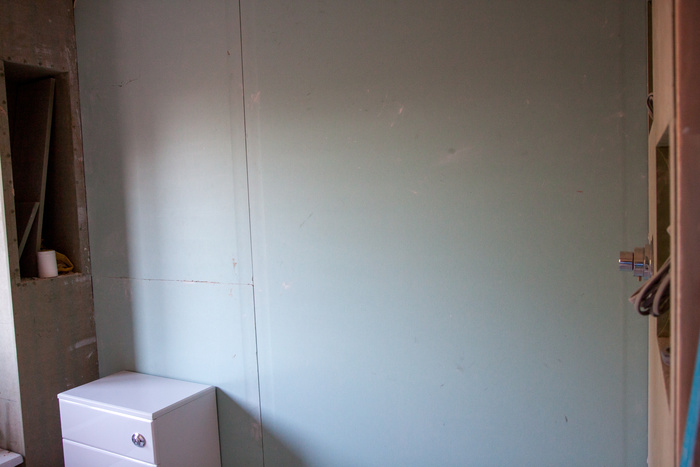
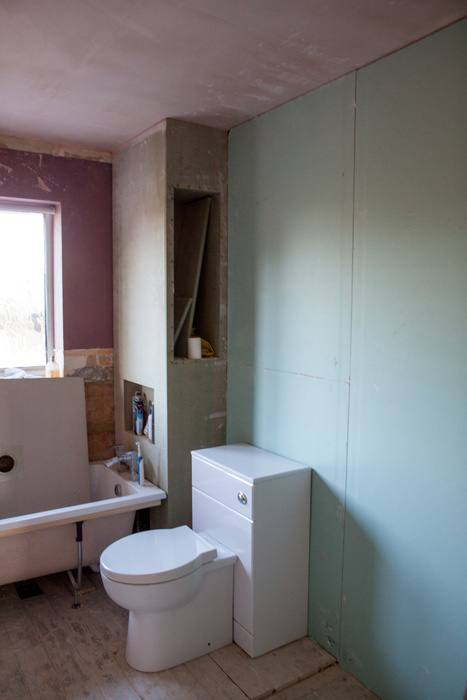
Photo 1: The fascia and soffits around the back dormer window.
Meanwhile back inside,the plasterers prepped the walls in the utility room - I was beginning to think we were never going to see the end of the orange walls! The also finished boxing in the waste pipes in the library and above the breakfast bar, and the underside of the stairs.
Photo 2: The orange wallpaper in the utility room is removed and the walls prepared for plastering.
Photo 3: The waste pipe from the en suite is boxed in in the study - you'll hardly notice it there when the plaster and paint is on.
Photo 4: The waste pipe from the shower in the main bathroom is boxed in now above the breakfast bar. This may mean that we will need to find a new location for the big picture that used to hang here, but we have a lot more wall space now, so that shouldn't be a big issue! More importantly, the hole in the ceiling finally has now been boarded up, ready for plastering.
Photo 5: The new stair case is boxed in with plasterboard. Note the small sloped bit between the horizontal and the underside of the risers - this took a few men a good while to decide whether it should come out to level with the horizontal, or be where it is here. Good decision, whoever made it!
This evening, after our exertions last night of removing the adhesive from the bathroom wall, we learned how to dot and dab plasterboard (moisture-resistant, green plasterboard, bought home on the roof of the car). Firstly we had to cut the plasterboard to size - not easy to get bang on, whilst not being able to move the toilet cistern more than an inch away from the wall. The builder had plumbed it in in such a way that the housing unit was trapped and whatever we do in the bathroom is going to have to be around it! Once measured, cut and happy, we moved to dotting and dabbing. We still aren't sure which action is dotting and which is dabbing. Apparently I became quite proficient with the plasterers mixer - not dissimilar to whisking a meringue; we whisked until the plaster made nice soft peaks! We realised that the plasterers make throwing plaster on the wall look rather more easier than it is, as to start with there were more dots (or dabs) on the floor than on the wall. But eventually we got the hang of it and the plasterboard was raised in place, made vertical with the aid of a level, and held until it was holding itself. Despite the second late finish in a row, we were really pleased with our achievement. This will be a whole lot easier to tile onto!